Begin with opening the image that you want to add the Vignette effect to onto Photoshop.
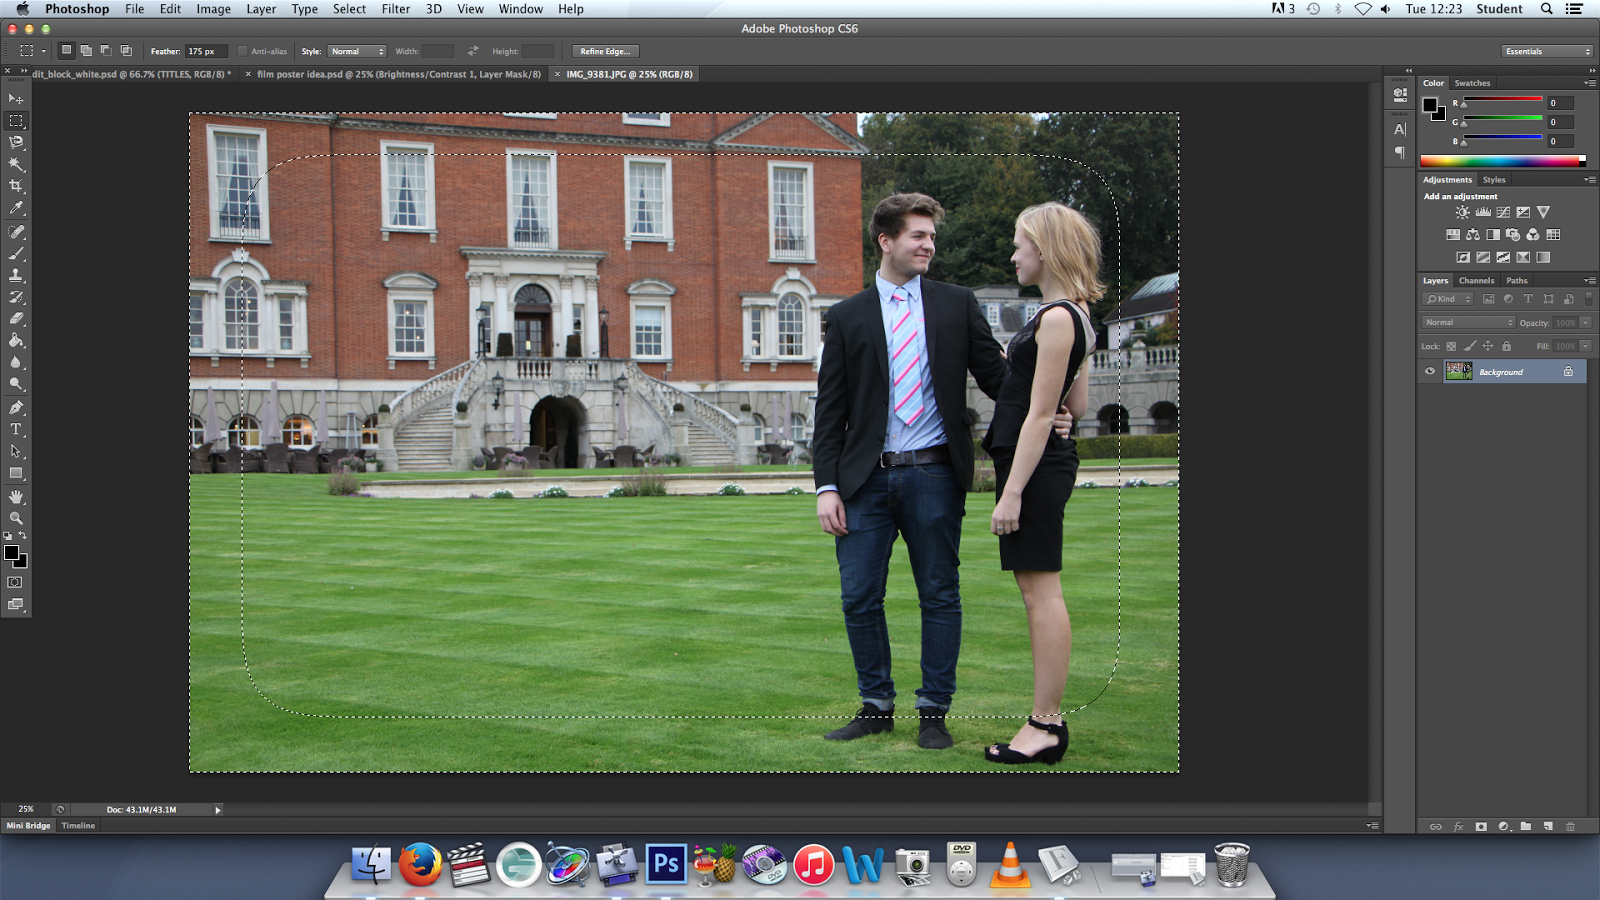
Select the marquee tool on the side bar on the left - I've used the rectangle one.
Also change the feathering so that the edges are softer and not to harsh.
A dashed/dotted line will appear over where you have dragged the shape (where you want the vignette to be).

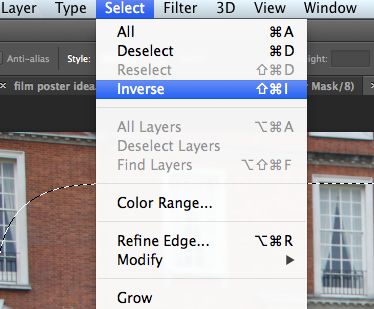
So far the marquee tool has selected the middle of the image, so to select the outer part, click select on the top toolbar and then click inverse (or shift, command and i)

It's now selected the outside of the image with slightly curved edges to make it a bit more subtle.

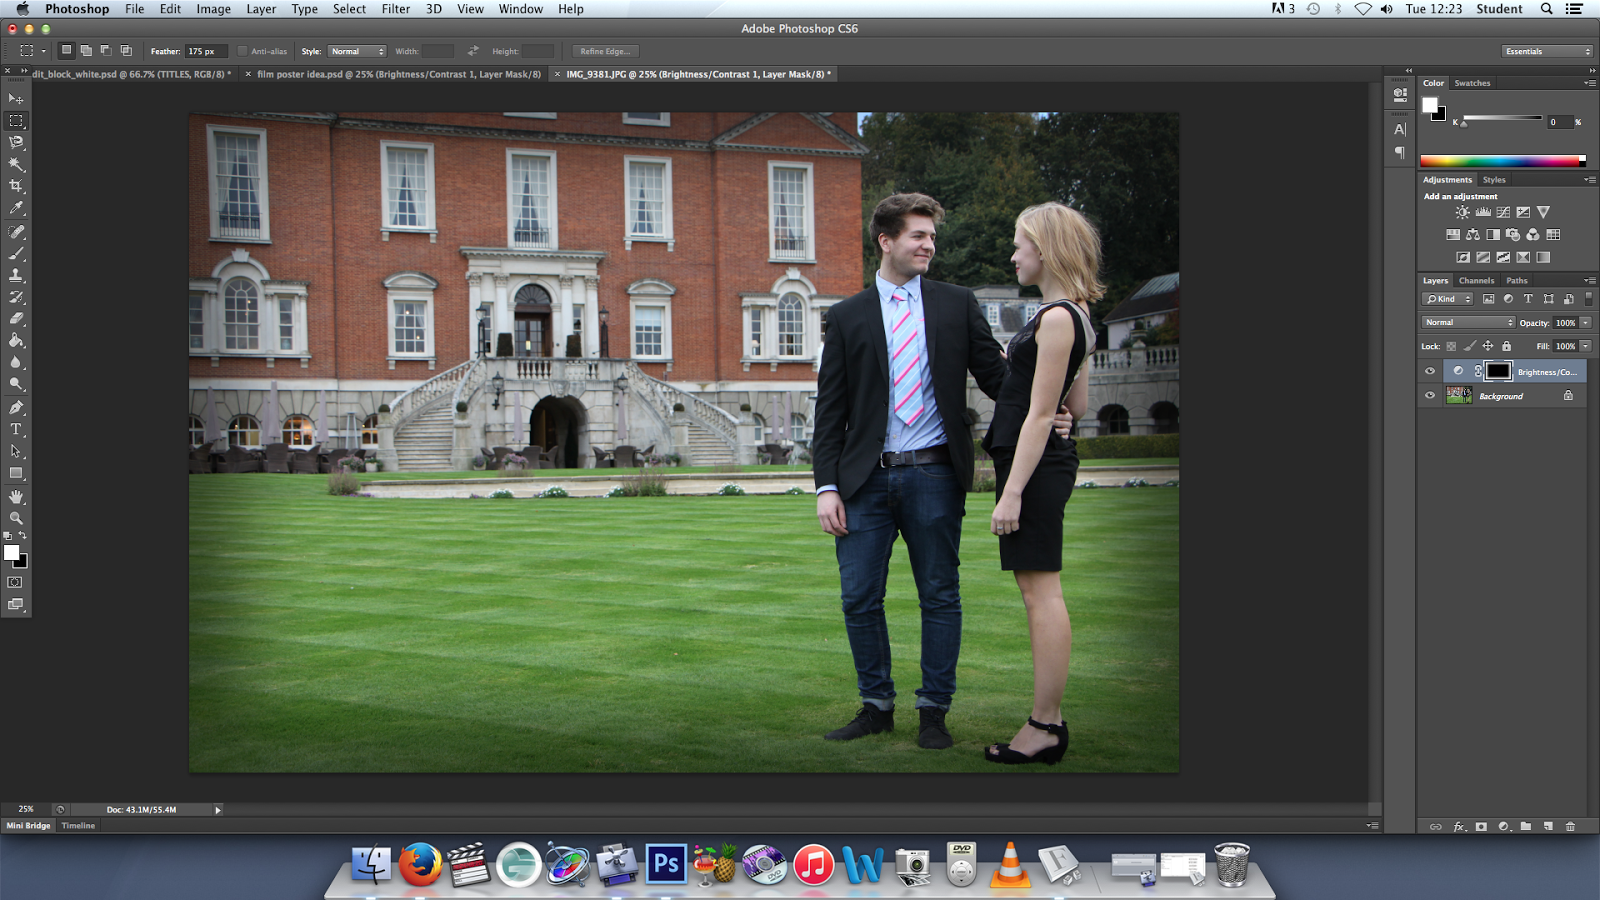
With the area still selected, click on the little sun icon on the adjustments section on the right hand side, which will bring up the levels for brightness and contrast.

You can change the levels until you reach the intensity that you want for the image.


Excellent evidence
ReplyDelete